Steam Wallet

|
Frequently Asked QuestionsThis FAQ is here to answer all the questions you may have regarding to how our website works. If you haven't found an answer here, you are always welcome
to send us an email through our support page. Please make sure you read our Terms of Use & Conditions. What do we do?
Gaming Dragons is an online store that offers video games at attractive prices.
We provide you with a Game code that you can redeem on various popular platforms to activate your game.
Why are your prices considerably low?
We are cheaper than others because we buy the games from various licensed sources.
We are able to provide competitive prices because we do not have to export a physical unit to your house which also decreases the handling fees and eliminates the shipping cost.
This way we can be more efficient, fast and satisfactory to our customers. What type of currencies do you accept?
We accept the following types of currency:
NOTE: Currencies are region based and cannot be manually selected. What are the available payment methods?
Currently we offer payment via PayPal and Moneybookers (Skrill) which are secured payment services with SSL encryption made to protect your transaction and information.
Once you've agreed to our Terms of Use, you will be given the option to choose your payment method
How do I place an order?
To purchase a game or games, simply click "add to cart". Once you've added your desired game(s) to the cart, you will be able to view it by clicking "Checkout" at the top of the page. After you have read our Terms of Use and pressed "Agree", you will then need to choose your payment method.
How do I receive my game?
After you have successfully completed your payment, it will be processed and once verified, an email with the game code and instructions will be dispatched to the address attached to the payment method provided upon purchase.
How do I activate my game?
An email containing the game code and a detailed explanation on how exactly to activate your game will be sent to your email address.
Also, you can always check “My Games” tab in your account for the game code and the instructions on how to activate the game. This feature is available for registered users only. Can I get a refund?
You will only be entitled to a refund if your game hasn't been delivered to you within 24 hours from your initial purchase. If you wish to request a refund for any reason, you may do so by contact form accessed via the "Contact - Support" link at the top of the page - with a brief description of the cancellation reason along with your order number.
The same rule applies also for games that are in preorder state.
If you haven't received your game within 24 hours since the initial release of the game
You will be entitled to receive a refund.
How long does it take for my Game code to arrive?
Purchasing as a guest, the order will be fulfilled within 30 minutes to 2 hours after your purchase.
Purchasing as a registered user, your order will be fulfilled instantly after your account has been approved for automatic delivery. NOTE: Rarely it can take up to 24 hours for orders to be fulfilled. What is identity verification?
Upon the first purchase, we require orders to be verified if our anti-fraud system detected that something went wrong with the purchase by submitting a photo copy of an ID/Driver's license showing solely the picture and full name. All other information can be cut out / censored. Your photo can be taken with a camera or a scanner. You can also use various ID's like a Student, Work card, I.D., Driving License. These steps are taken to verify that you are indeed the owner of the payment method or credit card owner who made the purchase.
NOTE: Black and white scans/images will not be accepted. Please provide a proper quality image or scan; low resolution images will be rejected. Sorry for any inconvenience this may cause. Please note that this step is required only once. Security & Reliability
Our website is protected by Norton and Verisign Security and Trust Seal scanned daily for security threats.
Your personal orders and data are stored in our database for only two reasons, maintain orders and protect your CD-Key. If you lost it, we can always provide it to you at any time. Why should I create an account?
By creating an account you gain access to our users interface system which enables:
What can I do with these gems?
The gems rewards system is designed to give back to our customers. Once you have collected enough gems you can use them to gain a significant discount or even pay for your next order using only your collected gems.
Collecting gems is easy: Everything you do in our shop grants you points. The amount itself varies depending on the action you are performing and the level you are on. You can embed a widget to a specific game on your own website. If you have an account you will be granted gems and XP points for every purchase redirected from your website. You may also collect gems by referring your friends using your unique code or referral link located under the “Collect Gems” tab in your account. Can I withdraw gems? After you have collected more than $50 worth in gems you can withdraw all or some of the amount to your service of choice – PayPal or MoneyBookers. To withdraw your funds go to your account page, click on “My Stash” and scroll down towards the withdrawal form at the bottom of the page. Choose the amount you wish to withdraw, your payment handling service and enter your corresponding email. What is the "wishlist"?
The ‘wishlist’ allows you to make a list of all your favorite games and receive notifications about sales, price changes and availability.
How do I track my orders?
After you have placed an order and got your order ID, you can track your orders by heading to your account page and then clicking “My Games”. If you can’t see your order in the games list, you can search for it by the order ID or by the game(s) you purchased.
What is account evolution?
Account Evolution is a progression system that allows you to gain experience points and level up.
With each level up you gain more Gems Leveling up is easy. There are many options to gain XP points:
This feature is available for registered users only. Why should I review games?
In general, posting an honest and constructive review for a game helps others get a better understanding of the product. In addition, posting a review adds even more gems and XP points to your account.
Guides & TutorialsIf you are not sure how to go about a certain thing on our website, you can use these helpful guides & tutorials. Iconology - How to know which platform will run your game When browsing our games you will notice that just above the price tag there are different icons. In this guide, you will learn what those icons mean and what are the necessary steps you need to take upon receiving your game. Steam game activation guide Once you have received our email with the game code, you will need to activate it via Steam. We have assembled this guide to help you through the process. Before you are activating your game, you will need a Steam account and client software downloaded. Download Steam Client Register a Steam account Now that your account is set up and ready, and the Steam client software is installed, follow the next steps in order to activate your game. STEP 1 - In the main Steam window, click on "Library". 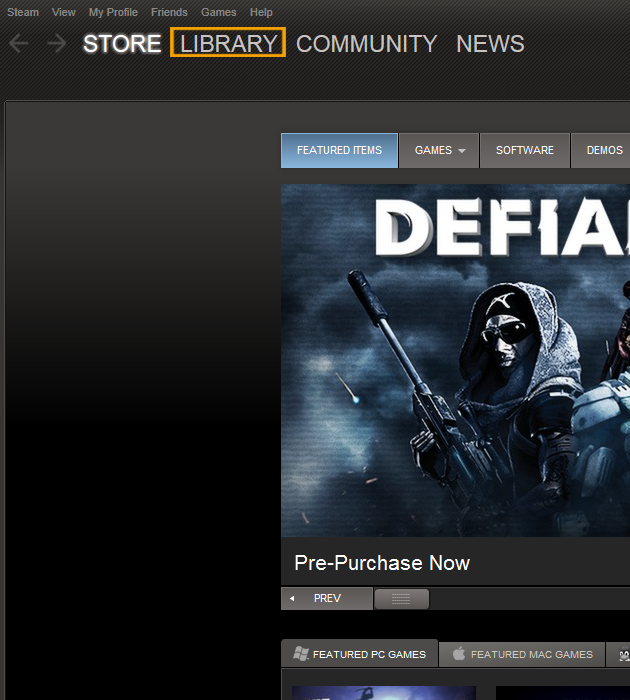 STEP 2 - Once in the Library section, click on "Add Game.." at the left-bottom of the Steam client.  STEP 3 - In the dropdown menu, click on "Activate a game on Steam..." 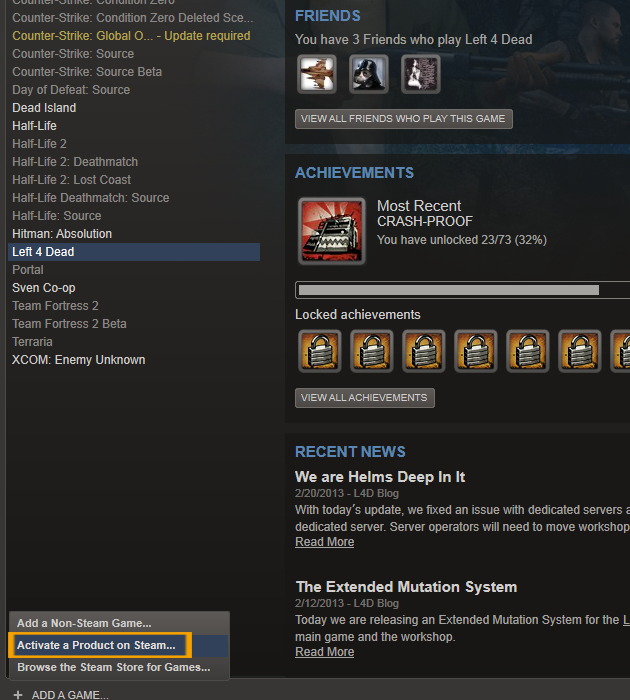 STEP 4 - A pop-up window will appear in the main area of the client, click "Next". 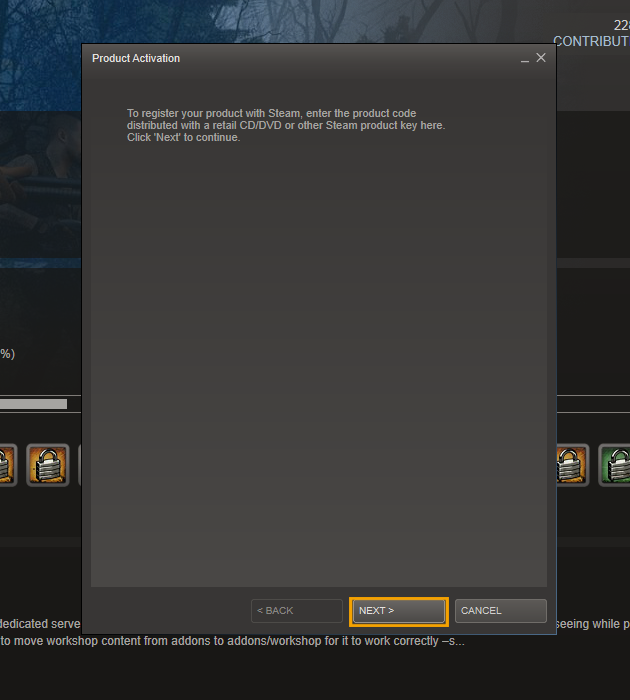 STEP 5 - Read and review Steam Subscriber Agreement. Once you're done click "Agree". 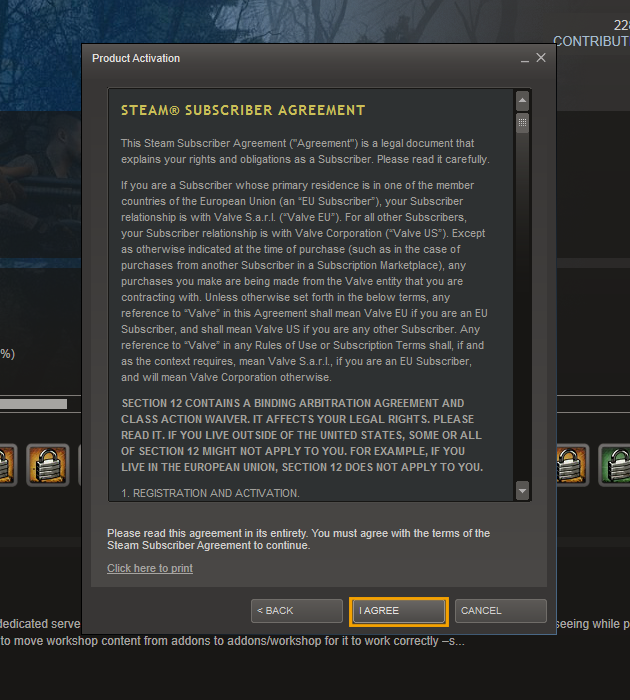 STEP 6 - Enter your code in the field according to the examples and click "Next". 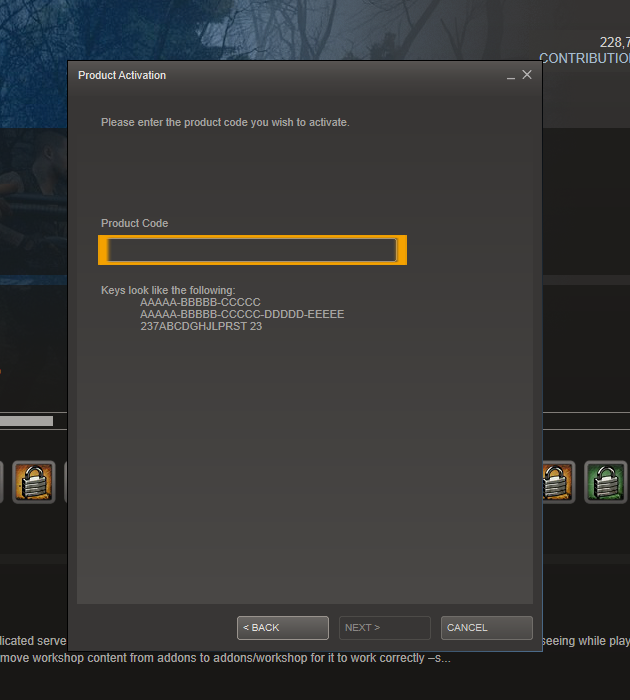 After completing these steps, Steam will then activate your product and place it in your games list under the "Library" section. You will then be prompted to download the game after which you will be able to launch and play. Origin games activation guide Once you have received our email with the game code, you will need to activate it via Origin. We have assembled this guide to help you through the process. Before you are activating your game, you will need an Origin (previously EA) account and client software downloaded. Download Origin client software Register an account with Origin After downloading Origin client software and registering an account, please make sure to open Origin and log in using your registration details. Once logged in you will need to follow the next steps in order to activate your game. STEP 1 - In the main Origin window, click on "Origin" at the top left corner. 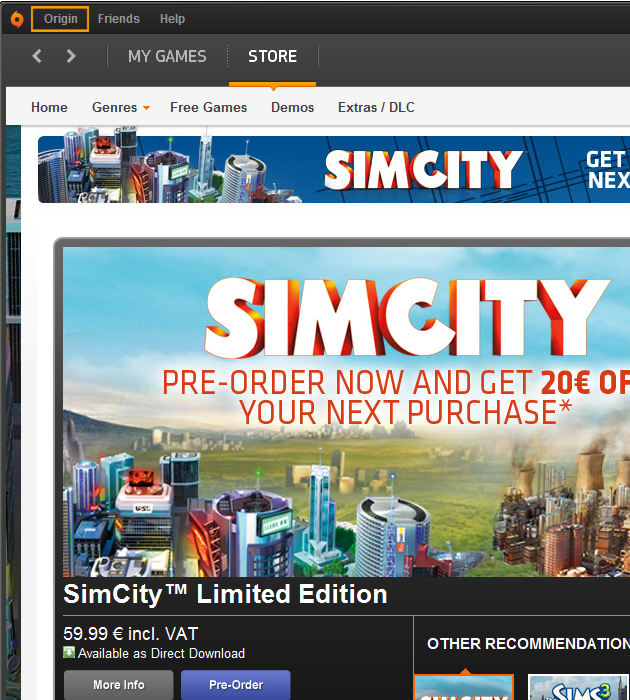 STEP 2 - In the dropdown menu, click on "Redeem product code..." 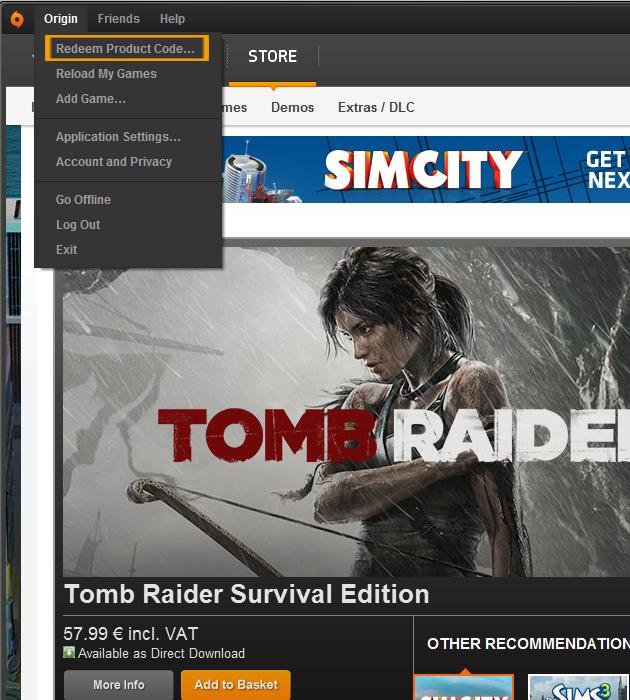 STEP 3 - In the pop-up window, enter your key and click "Next". 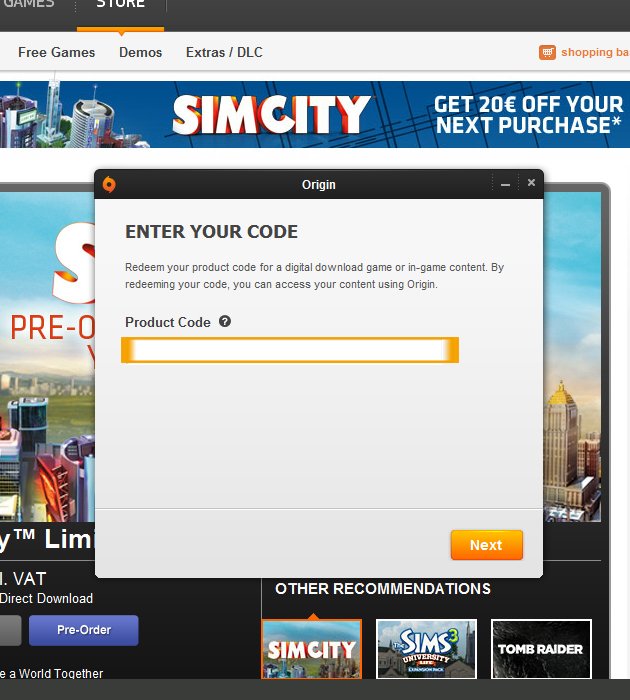 After completing these steps, Origin will notify you that the game is now activated and ready to be downloaded. Click on the tab "My Games" and then click on the image of the game you just purchased to begin downloading. Once the download is complete you can launch the game and play. Battle.net game activation guide If you have ordered a game developed by Blizzard Entertainment you will probably need to activate it via their own service on Battle.net. After you have a received the key from us, you will need to create a new battle.net account (if you don't already have one)
and redeem your code there. This guide explains how - press on the link below and follow the next steps. Battle.net STEP 1 - Once you entered the battle.net website you will see the following screen. If you already have a battle.net account click on "Login" at the top of the page, if you don't click "Signup". 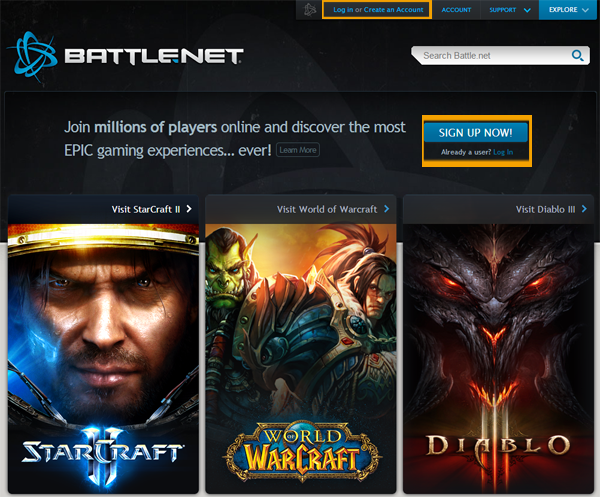 STEP 2 - After you have created an account, log in. Once you're logged in you will see the following screen. Click on "Manage my Games" 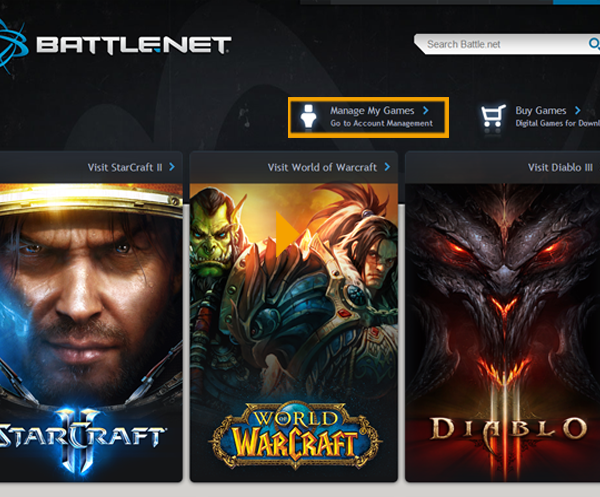 STEP 3 - You will then be able to see all your games from Blizzard. Now click on "Games & Codes" and then on "Add a game key". 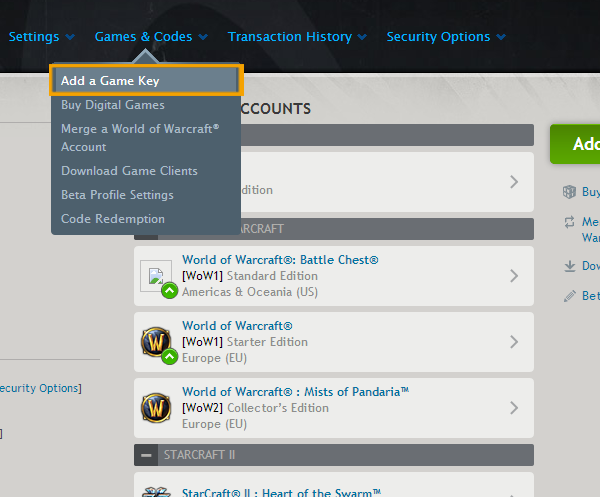 STEP 4 - Enter your code on the newly loaded page 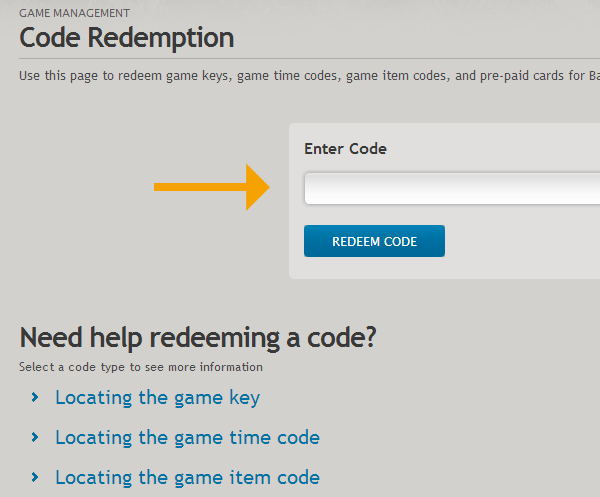 After you have entered the code, your game will appear in the games list that can be seen in STEP 3. Click on the game and then click on "Download Client" to download the game client, launch and play. NOTE: World of Warcraft requires a subscription plan to play. Games for Windows Live game activation guide By ordering a product key for a game for Games for Windows, you will be supplied with clear instructions upon how to download, install and activate your game. This guide will explain what you need to do to activate the game. In the email you will receive after purchasing a game, you will see the game key and instructions on how to activate the game.
1). Download the game from here: http://www.example.com/download/ STEP 1 - Follow the link specified in instruction 1 and click to download the game. STEP 2 - After the download is complete, you will prompted to enter the password we provided in instruction number 2. 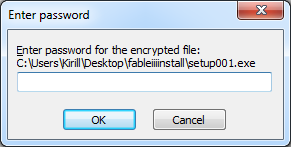 STEP 3 - Choose the install destination and click "Install". 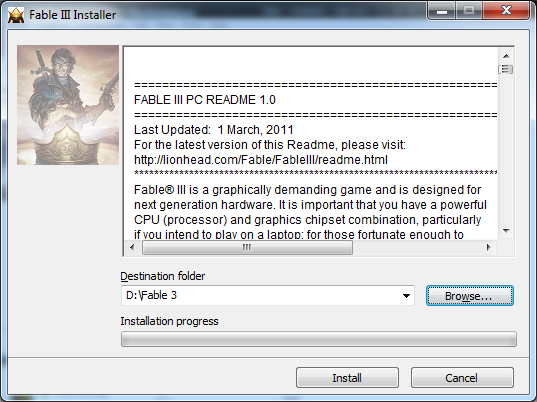 STEP 4 - Install the game using the game installer.  STEP 5 - When prompted enter the game key we provided in the email and click "Next"  STEP 6 - After the install is finished you will be asked to authenticate your game online. Enter the CD-Key we provided and click "Activate".  Enjoy your game! UPlay game activation guide Once you have received our email with the game code, you will need to activate it via Uplay. This guide will help you through the process. Before activating your game, you will need a Uplay account and client software downloaded. Download Uplay Client Register an account with Uplay After you have registered to Uplay and installed the client software, open Uplay and follow the next steps: STEP 1 – Click on the cogwheel icon at the top right. 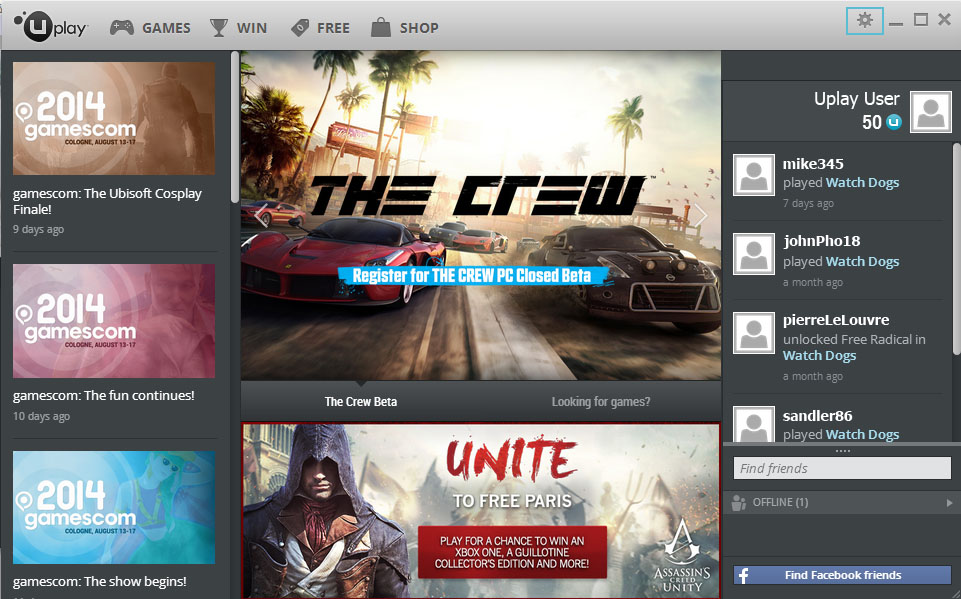
STEP 2 – In the opened menu, click on “Activate Product”. 
STEP 3 – In the newly opened window, enter the provided cd-key. 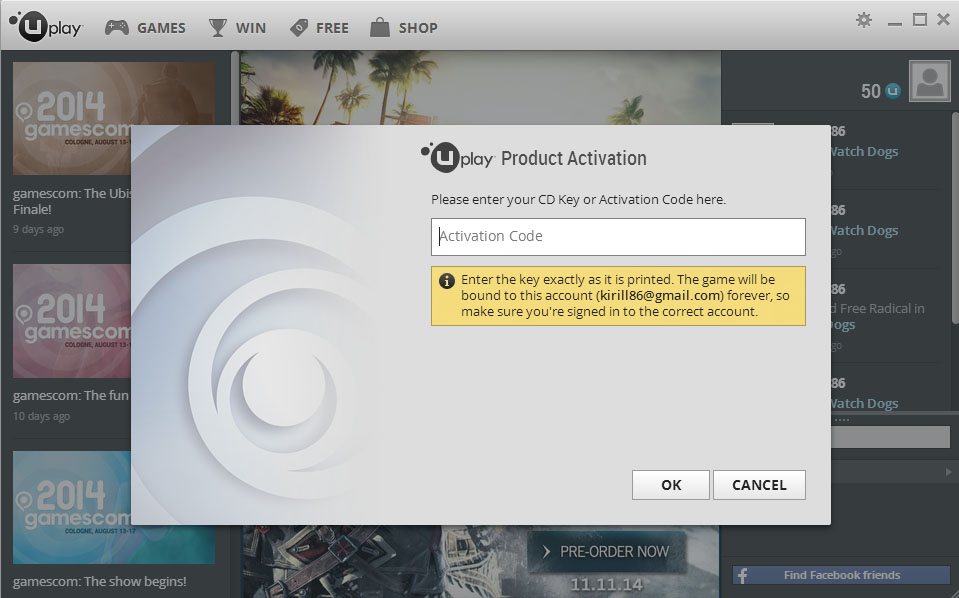
STEP 4 – Once the game has been activated it will appear in the Games tab. 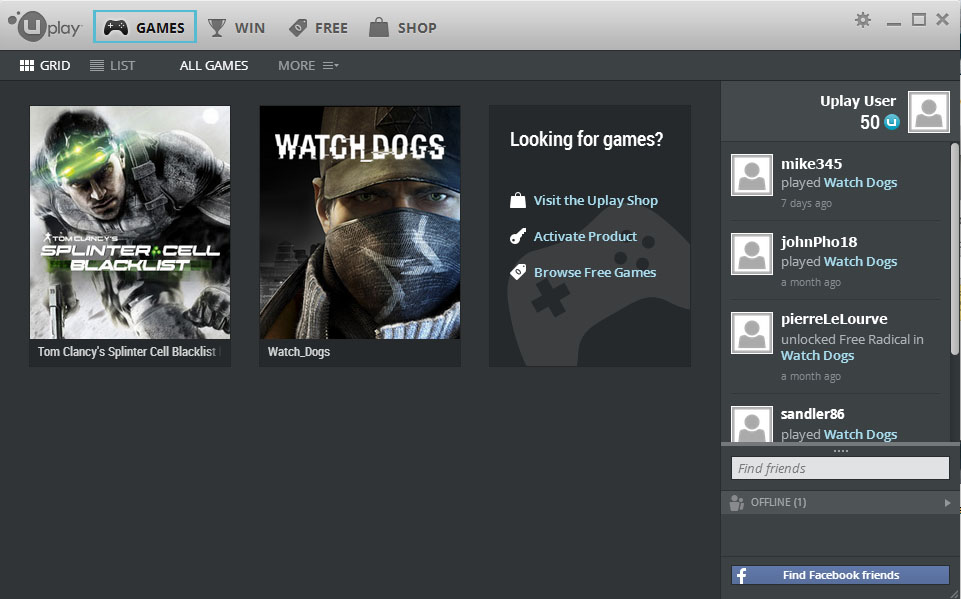
STEP 5 – Click on your activated game and press “Download” 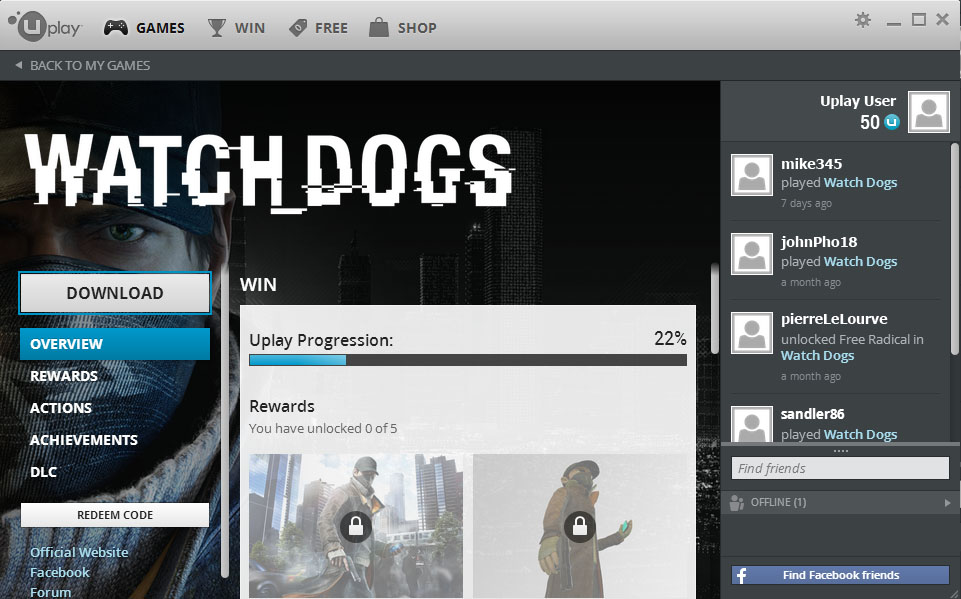
STEP 6 – Follow the installation guide and wait for the download to finish. Once it’s finished, just click on “Play” and enjoy! Direct & DRM-Free downloads guide Downloading purchased itemsAfter you complete the checkout process, you will receive an email with download link and instruction on how to download, install and activate the game. Also, every game you purchase gets added to your “My Games” page, so if you ever need to redownload a game, that's the place you want to visit.Re-downloading your purchased games and limitationsYou can always re-download games via the “My Games” page. Also, there is no limit to the number of redownloads, but please remember that you're not allowed to share your account with other users as only you are entitled to download games from your account.Backing up your gamesYes you can but only if the game is DRM-free. As soon as you download the setup file, you can back it up on a DVD or your external hard drive without hassle. If you forgot to backup your purchased games, you can always redownload them from our website for free. |
-
- English

- English (US)

- English (UK)

- Dansk

- Deutsch

- Suomi

- Francais

- Español

- Svenska

- Dutch

- Português (BR)

- Português (PT)

- Italiano

- Norsk

Language
- English

 Cart
Cart
0